
This article covers the recommended upgrade procedure for updating NetSupport Manager to the latest version.
First, you need to download the latest installer file. The easiest way to do this as an existing customer is to register for a My Support account on our website (if you haven’t already).
For further information on the My Support registration process, please refer to the following technical article: Registering your license key on the My Support portal.
Once you have registered your NetSupport Manager licence in your My Support account, you can email yourself a copy of the NSM.lic from the ‘My Licenses’ section.
We recommend updating your NetSupport Manager components in the following order:
- NetSupport Manager Connectivity Server (Gateway) installation.
- NetSupport Manager Client installations.
- NetSupport Manager Control installations.
Further details of the available update methods are provided below:
Manually updating a Windows NetSupport Manager installation
If you place a copy of the NSM.lic file in the same folder as the new setup.exe installer file, when you run the upgrade over the top of your existing installation, it automatically applies this licence to the installation. This prevents the need to register your licence after the upgrade is complete, and you are not prompted to enter your licence details during the installation.
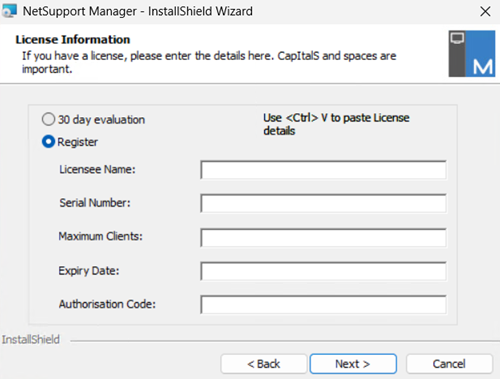
Alternatively, if you do not place the licence file in the same folder when you run the new version NetSupport Manager installer over the top of the existing installation, you are prompted to enter the new licence details during installation (see the image below).
When running the installation manually, you are prompted to choose which NetSupport Manager component you would like to install.
Creating a NetSupport Manager silent install package to deploy
In order to automate the installation of NetSupport Manager using your chosen deployment method (Active Directory Group Policy, SCCM, Intune, etc.), you can create a new package folder containing the new installer file and licence file for NetSupport Manager. Depending on your setup, you will need to create a package containing the following files:
- NetSupport Manager.msi.
- NSM.lic (licence file).
- NSM.ini (the component file that tells the installer which components to install, i.e. Control, Client).
An example copy of this file is located in the following directory: C:\Program Files (x86)\NetSupport\NetSupport Manager\Deploy - Client32u.ini (this is the pre-configured Client configuration file).
Note: Two package folders may be required to implement NetSupport Manager: one configured to deploy the Control component only, and a second configured to install the Client only. Each package contains the same installer and licence file. However, the NSM.ini file will be different in each package folder, as this file controls which components to install (Control or Client).
Manually updating a macOS NetSupport Manager installation
To manually update the version of NetSupport Manager installed on your macOS devices, first place a copy of the new NetSupport Manager Mac PKG installer and NetSupport Manager licence file on the machine you would like to update. Run the PKG from the same location as the licence file. When you run the installer, this detects the licence file in the same location and applies it automatically.
Deploying NetSupport Manager for macOS
For information on how to deploy the new version of NetSupport Manager for macOS, please refer to the following guides: