Within NetSupport DNA, it is possible to create different web lists for different profiles. This has the advantage of offering greater control of web content for your requirements. You can set DNA to allow greater freedoms or more restrictions to designated groups via the profiles.
Create a new profile
- In the Settings tab, click the Create new profile icon.
- The Add Profile dialog will appear.
- Enter the name and description for the profile. You can copy an existing profile by selecting the relevant one from the drop-down list.
- Click OK.
- The Settings dialog will appear. Configure the required component settings and click Save.
- The Profile Assignment dialog will appear.
- The profile can be assigned to users, an Active Directory group, PCs and departments. Click Assign next to the relevant area and a Tree will appear, allowing you to select who to assign the profile to.
- The new profile will be listed in the Manage Profiles dialog.
- Click Close.
Applying the settings
Once you have created the required profiles, you can then apply the relevant settings to each unique profile.
- In the Settings tab, click the Manage existing profiles icon.
- The Manage Profiles dialog will appear, listing existing profiles. Select the profile you want to manage.
- To amend the settings for a profile, click Settings. You will be presented with the following screen:
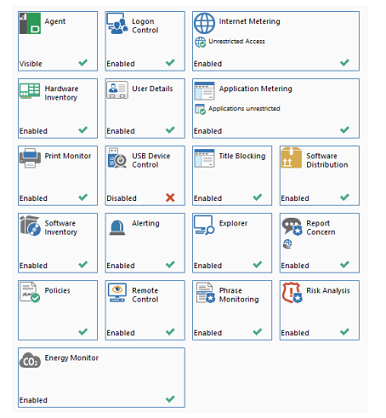
- Select Internet Metering. In the screenshot above, this is shown as enabled. Any changes made will be saved to the selected profile ONLY, and not applied to the whole organisation.

- Within the Internet Metering screen, you can set the selected profile to provide unrestricted access, approved site access, block restricted sites or block all internet usage. You can even set access to certain periods of the day.
- A URL list (a list of approved and/or restricted websites) can be assigned to a profile. Select the required list from the drop-down menu. To create or manage lists, click Manage.
Note: For the list to be activated, the internet access level must be set to one of the ‘restrict internet’ access options, or, if using custom access, the ‘approved sites’ or ‘block restricted sites’ enabled. - It is possible to have multiple DNA profiles assigned to your environment. This can be done based upon year group, setting or other means of division.