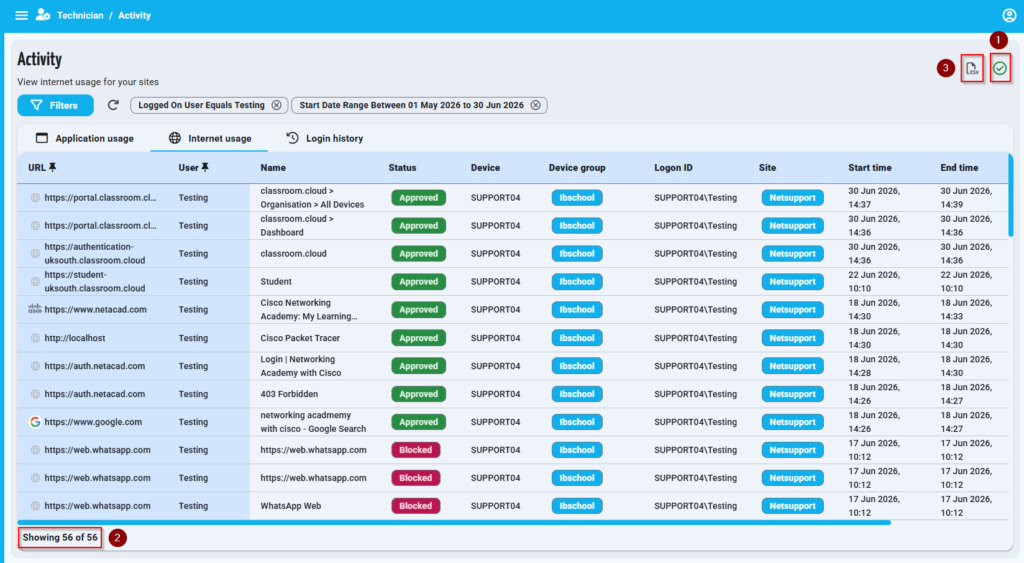
This article explains how to filter and export the Internet usage activity for a specific user in classroom.cloud. You can also apply multiple filters, such as the Logged On User and Start Date Range filters, to refine the results before exporting them to a CSV file.
Step 1: Open the Activity page
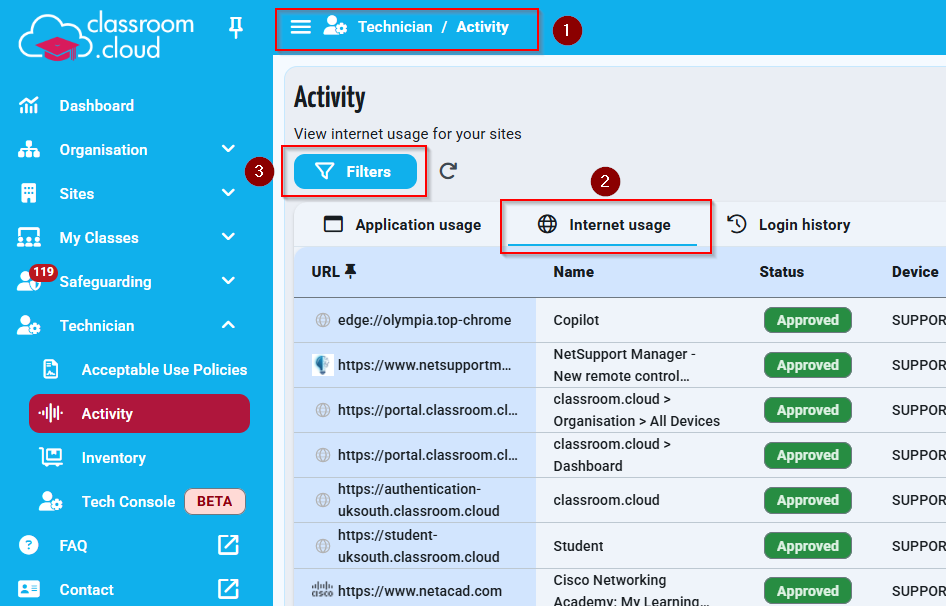
- Sign in to the classroom.cloud portal.
- From the left-hand navigation menu, select Technician.
- Select Activity.
- Open the Internet usage tab.
- Click Filters to begin filtering the activity records.
Step 2: Filter by the logged-on user
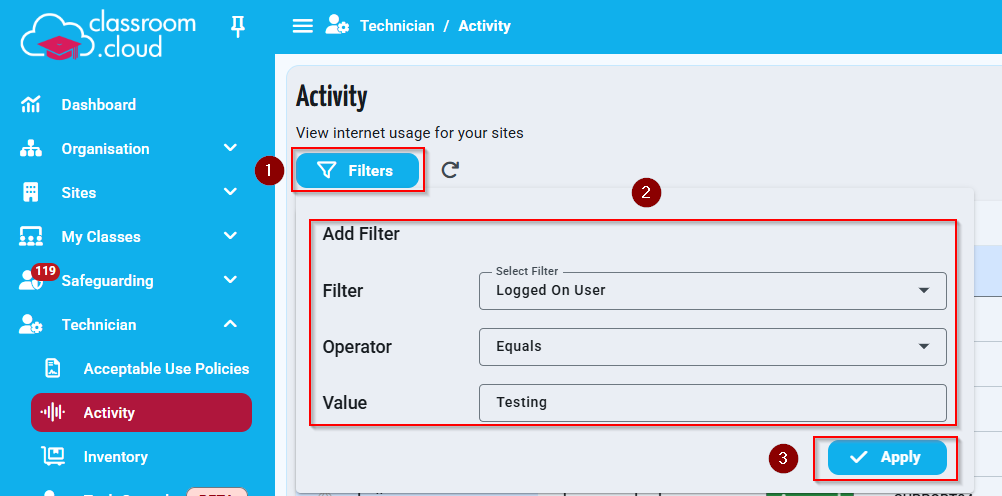
- Click Filters.
- In the Filter drop-down menu, select Logged On User.
- Set the Operator to Equals.
- In the Value field, enter the username of the user whose internet activity you want to view.
- Click Apply.
Step 3: Add additional filters
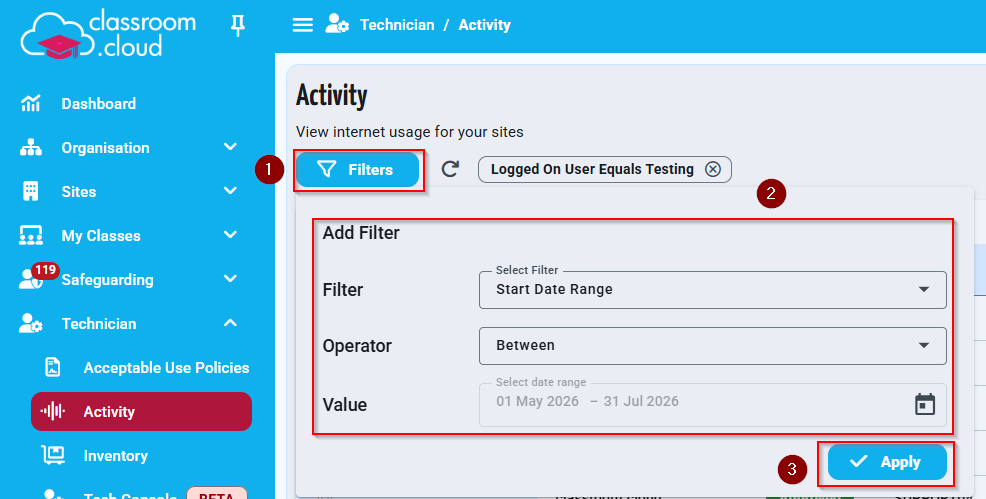
You can apply multiple filters to further refine the results. For example, in addition to filtering by the Logged On User, you can add a Start Date Range filter.
To add a date range:
- Click Filters again.
- From the Filter drop-down menu, select Start Date Range.
- Set the Operator to Between.
- Select the required start and end dates.
- Click Apply.
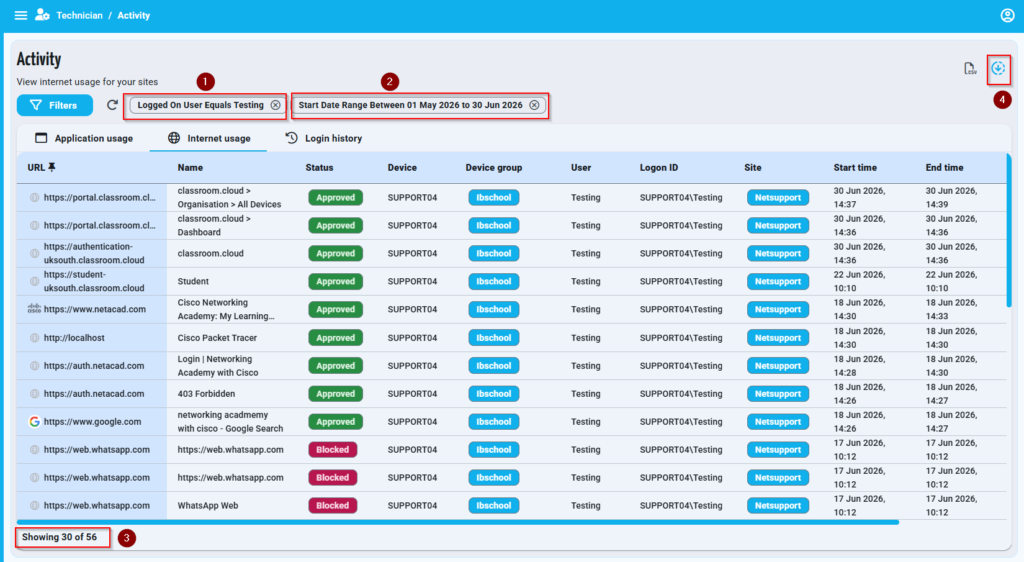
The applied filters will be displayed at the top of the Activity page. For example:
- Logged On User Equals Testing
- Start Date Range Between 01 May 2026 to 30 Jun 2026
You can use multiple filters together to ensure that only the required activity records are displayed.
Step 4: Make sure all activity records have been loaded
Before exporting the Internet usage activity, make sure that all records matching the selected filters have been loaded.
At the bottom-left corner of the activity list, you can see how many records are currently displayed. For example:
Showing 30 of 56
If not, all records have been loaded, use the Load next icon in the top-right corner of the page.
Once all available records have been successfully loaded, the icon in the top-right corner will display a green tick, and the record count at the bottom of the page should show all available results, for example:
Showing 56 of 56
The green tick confirms that all matching records have been retrieved and are ready to be exported.
Step 5: Export the Internet usage activity to CSV
Once all records have been loaded and the green tick is displayed:
- Confirm that the record count shows all available results, for example, Showing 56 of 56.
- Click the CSV icon in the top-right corner of the page.
- The filtered Internet usage activity will then be exported as a CSV file.